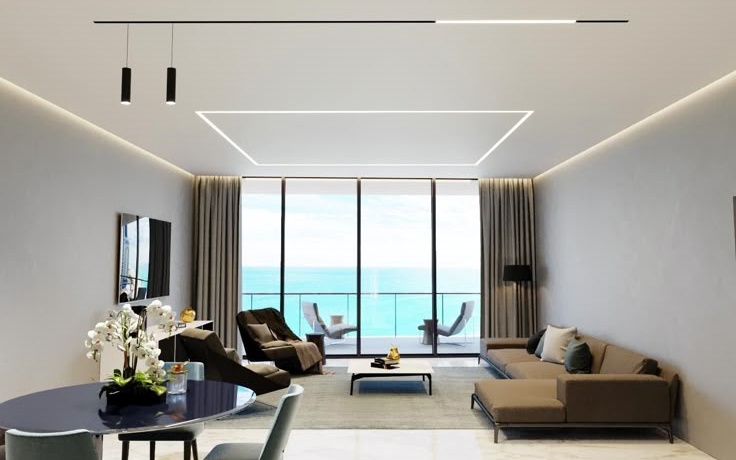
Installing a retractable ceiling with integrated lighting is the perfect way to enhance any space, combining the seamless, minimalist aesthetic of the retractable ceiling with the functionality of modern LED lighting. Whether you are a homeowner renovating your living room, a contractor for a commercial project, or an interior designer creating a stylish space, this guide will show you how to use LED strip stretched ceiling aluminum profiles, magnetic stretched ceiling aluminum profiles, and 48V magnetic lamps to install integrated lighting stretched ceilings.
Preparations before installation
Proper preparation is crucial before starting to install the retractable ceiling with integrated lighting. This ensures the smooth progress of the installation, avoids costly mistakes, and guarantees compliance with local building codes.
Essential tools and materials
- Stretch ceiling materials: PVC film, cut to size, 10-15% larger than the ceiling area, LED light strip stretch ceiling aluminum profiles, magnetic stretchable ceiling aluminum profiles.
- Lighting components: 48V magnetic lamps (spotlights, linear lamps, etc.), 48V power driver (compatible with magnetic tracks and LED strips), LED strips (for ambient lighting, paired with aluminum light strips), wire connectors and installation hardware.
- Tools: Laser level, electric drill, expansion screw, insertion strip (for fixing stretch film), hot air gun (for fixing PVC film), tape measure, utility knife, screwdriver, ladder/scaffolding.
- Safety equipment: Gloves, safety glasses, voltage tester.
Understand the installation requirements in various regions
- Europe (EU): Ensure that all aluminium profiles have CE certification and that standard fire-resistant materials (Class A1) comply with EU safety standards. Only use low-voltage lighting.
- North America (United States, Canada) : Select UL-certified 48V power drivers and fire-resistant stretch film. Fix the profile onto the ceiling beam.
- Asia (Southeast Asia, China, India) : Choose anodized aluminum profiles to cope with the humid climate. Waterproof LED strips (IP65+) are used in bathrooms, kitchens or coastal areas.
- Middle East: Select heat-resistant aluminum profiles and UV-resistant stretch films to withstand high temperatures and intense sunlight.
Step-by-step installation: Stretch ceiling with integrated lighting
Step 1: Install the aluminum profiles
Aluminum profiles are the foundation of your retractable ceilings and integrated lighting systems. First, install them to ensure stability and correct alignment:
- Use a laser level to draw a horizontal line on the ceiling beam. This can ensure that your outline is straight and even.
- Install LED strip stretching ceiling aluminum profiles around the ceiling and fix the aluminum profiles to the ceiling beams with expansion screws
- Install magnetic stretched ceiling aluminum profiles in the area where 48V magnetic lamps will be installed
Step 2: Install the lighting components
- Install the LED strip: Insert the LED strip into the dedicated channel for the LED strip stretched ceiling aluminum profile. Fix the rubber strip and cover it with a diffuser to eliminate glare. Connect the LED light strip to the 48V power driver
- Install 48V magnetic stretch ceiling aluminum material: Connect the aluminum material to the 48V power driver and ensure that the circuit is hidden in the configuration file
- Test lighting: Turn on the power driver and test the LED strips and tracks. Make sure all the lights are working.
Step 3: Prepare and install the stretch film
- Heat the PVC stretch film with a hot air gun to make it soft. This enables it to stretch without tearing.
- Fix the film to the corner of the aluminum profile: Use the insertion strip to insert the edge of the film into the film channel of the profile. Pull the film tight, work along each side, and fix it with the insertion strip as you do.
- Use a hot air gun to remove wrinkles. Keep the hot air gun 30 to 40cm away from the film to avoid burns.
- Use a utility knife to trim any excess film.
Step 4: Install the 48V magnetic lamp
- Just attach the 48V magnetic lamp to the magnetic track. No tools or wires are needed. The neodymium magnet will firmly fix the lamp in the appropriate position.
- Adjust the position of the lights on the track to achieve the lighting layout you want
- Adjust the Angle of the lights to direct the light where you need it - perfectly highlighting art, product displays, or workspaces.
Step 5: Set up intelligent control
To enhance flexibility and energy efficiency, set up intelligent controls for your integrated lighting system
- Connect the 48V power driver to the intelligent controller
- Download the corresponding application and pair the controller with your mobile phone or voice assistant.
- Set scene presets (for example, "Environment Mode", "Task Mode", "Night Mode")
- Test the intelligent control to ensure that you can remotely adjust the brightness and color temperature.
Step 6: Final inspection and cleaning
To enhance flexibility and energy efficiency, set up intelligent controls for your integrated lighting system
- Turn on all the lights and check if there are any problems.
- Check if there are any wrinkles on the stretch film. If necessary, you can use a hair dryer to heat it for repair.
- Clean the ceiling and surrounding areas - Wipe the stretch film with a damp cloth to remove dust.
Maintenance tips for long-lasting performance
- Clean the stretch film regularly with a damp cloth.
- Check annually whether the connection between the 48V magnetic lamp and the LED light strip is loose or damaged. If any faulty parts are found, they should be replaced in a timely manner.
- Wipe the dust off the aluminium profiles to prevent accumulation. - Avoid using irritating cleaners that can damage the surface.
- For intelligent control systems, applications should be updated regularly to ensure compatibility and performance.
Conclusion: Enjoy seamless stretched ceilings with integrated lighting
Stretching ceiling aluminum profiles with LED strips, magnetic stretching ceiling aluminum profiles and 48V magnetic lamps to install integrated lighting on the stretched ceiling is a simple process that can provide amazing effects. By following this step-by-step guide, you will create a seamless, energy-efficient space that combines minimalist aesthetics with functional lighting - ideal for residential, commercial and hotel projects worldwide.


